There are a few tricks that can help you get over writers block when it comes to writing blog posts. One of the best ways to do this is by quickly writing the first few paragraphs of your post and then expanding on them as you go. This way, you can get a sense for what the entire post will look like before starting to write.
If you are looking for an easy way to create your first blog post draft, look no further than MarketingCopy AI's Blog Post Wizard. With just a few clicks, you can have a rough draft of your post ready in less than a minute! This tool is perfect for anyone who wants to get started with blogging but doesn't have the time or inclination to write a full post from scratch. Simply enter your title and follow 5 steps and let the wizard take care of the rest! Whether you're new to blogging or just need to scale up your marketing content, MarketingCopy AI's Blog Post Wizard is the right tool for you.
Here are the five easy steps to use MarketingCopy AI's Blog Post Wizard to generate the first draft of your blogs in seconds.
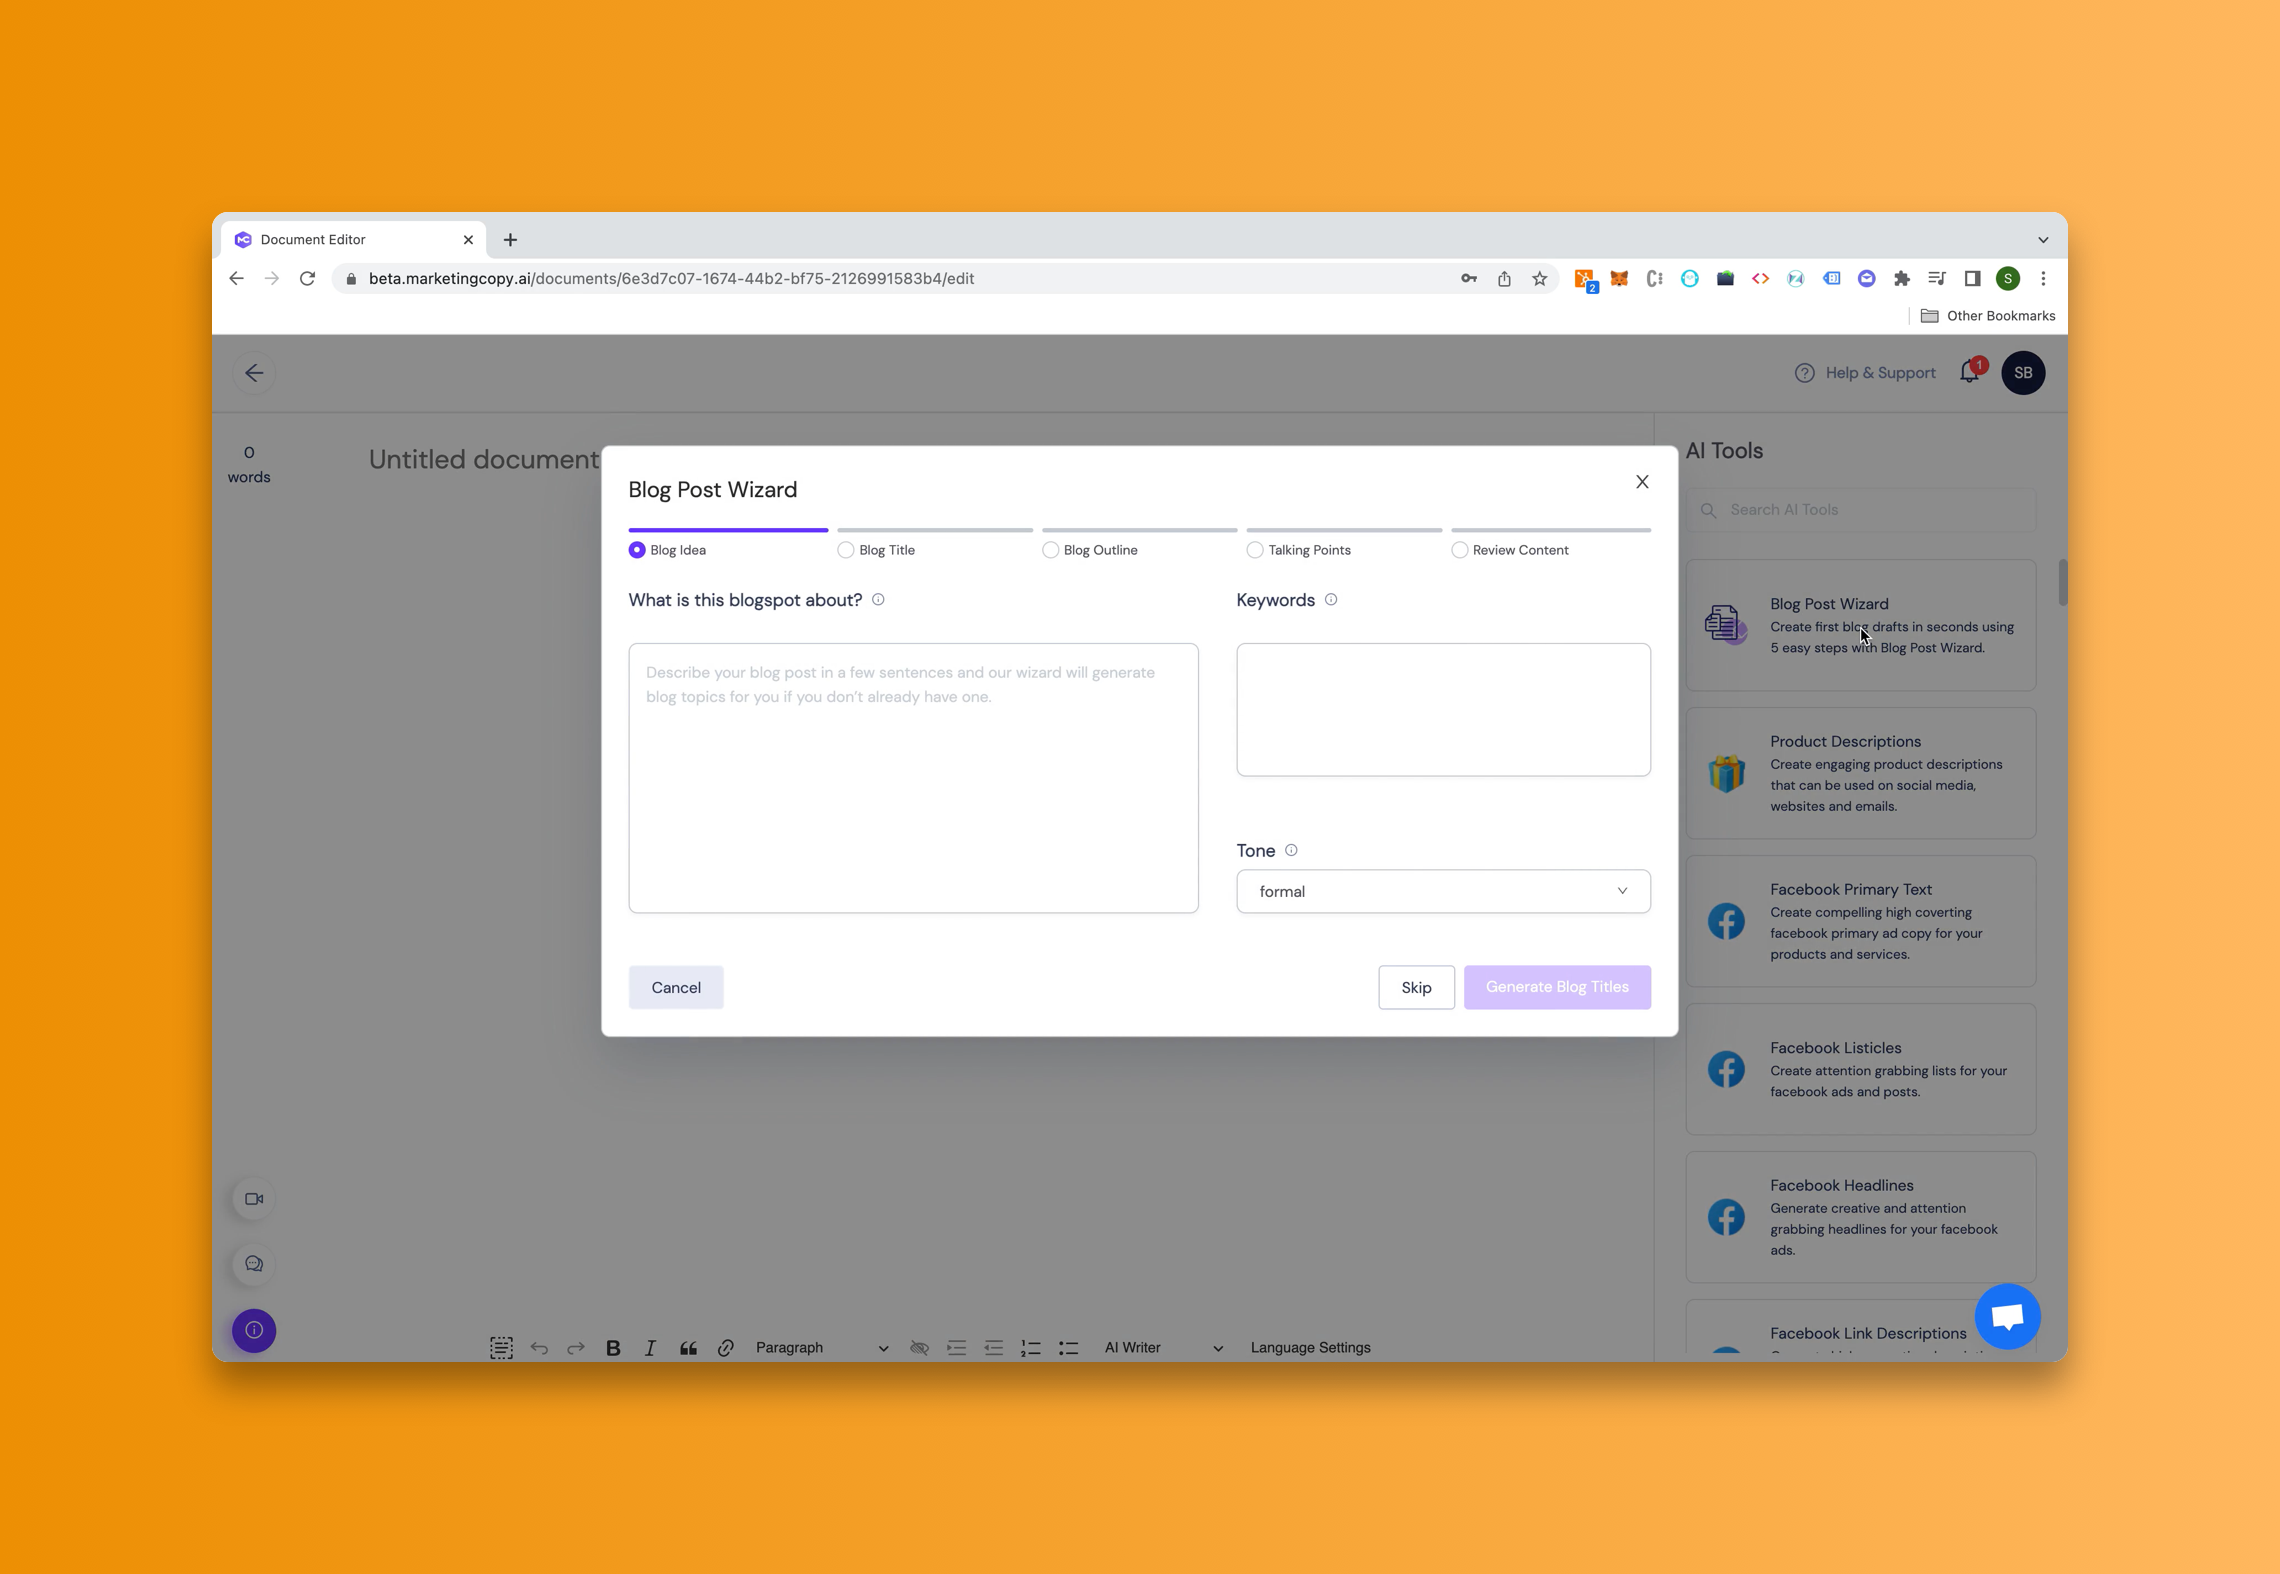
1: Blog Post Idea
If you want to generate a blog title that will engage your readers and help promote your content, then you need to use MarketingCopy AI's Blog Post Wizard. The wizard takes a few simple inputs from you, like the topic of the post and what tone you would like it to have, and generates a list of engaging blog title ideas for you.
You can then select the title that fits your overall theme and idea and create the first draft for this title. If you already have a blog title in mind then you can skip this step and just move to step 2 where you can directly enter the blog title.
2: Blog Post Title
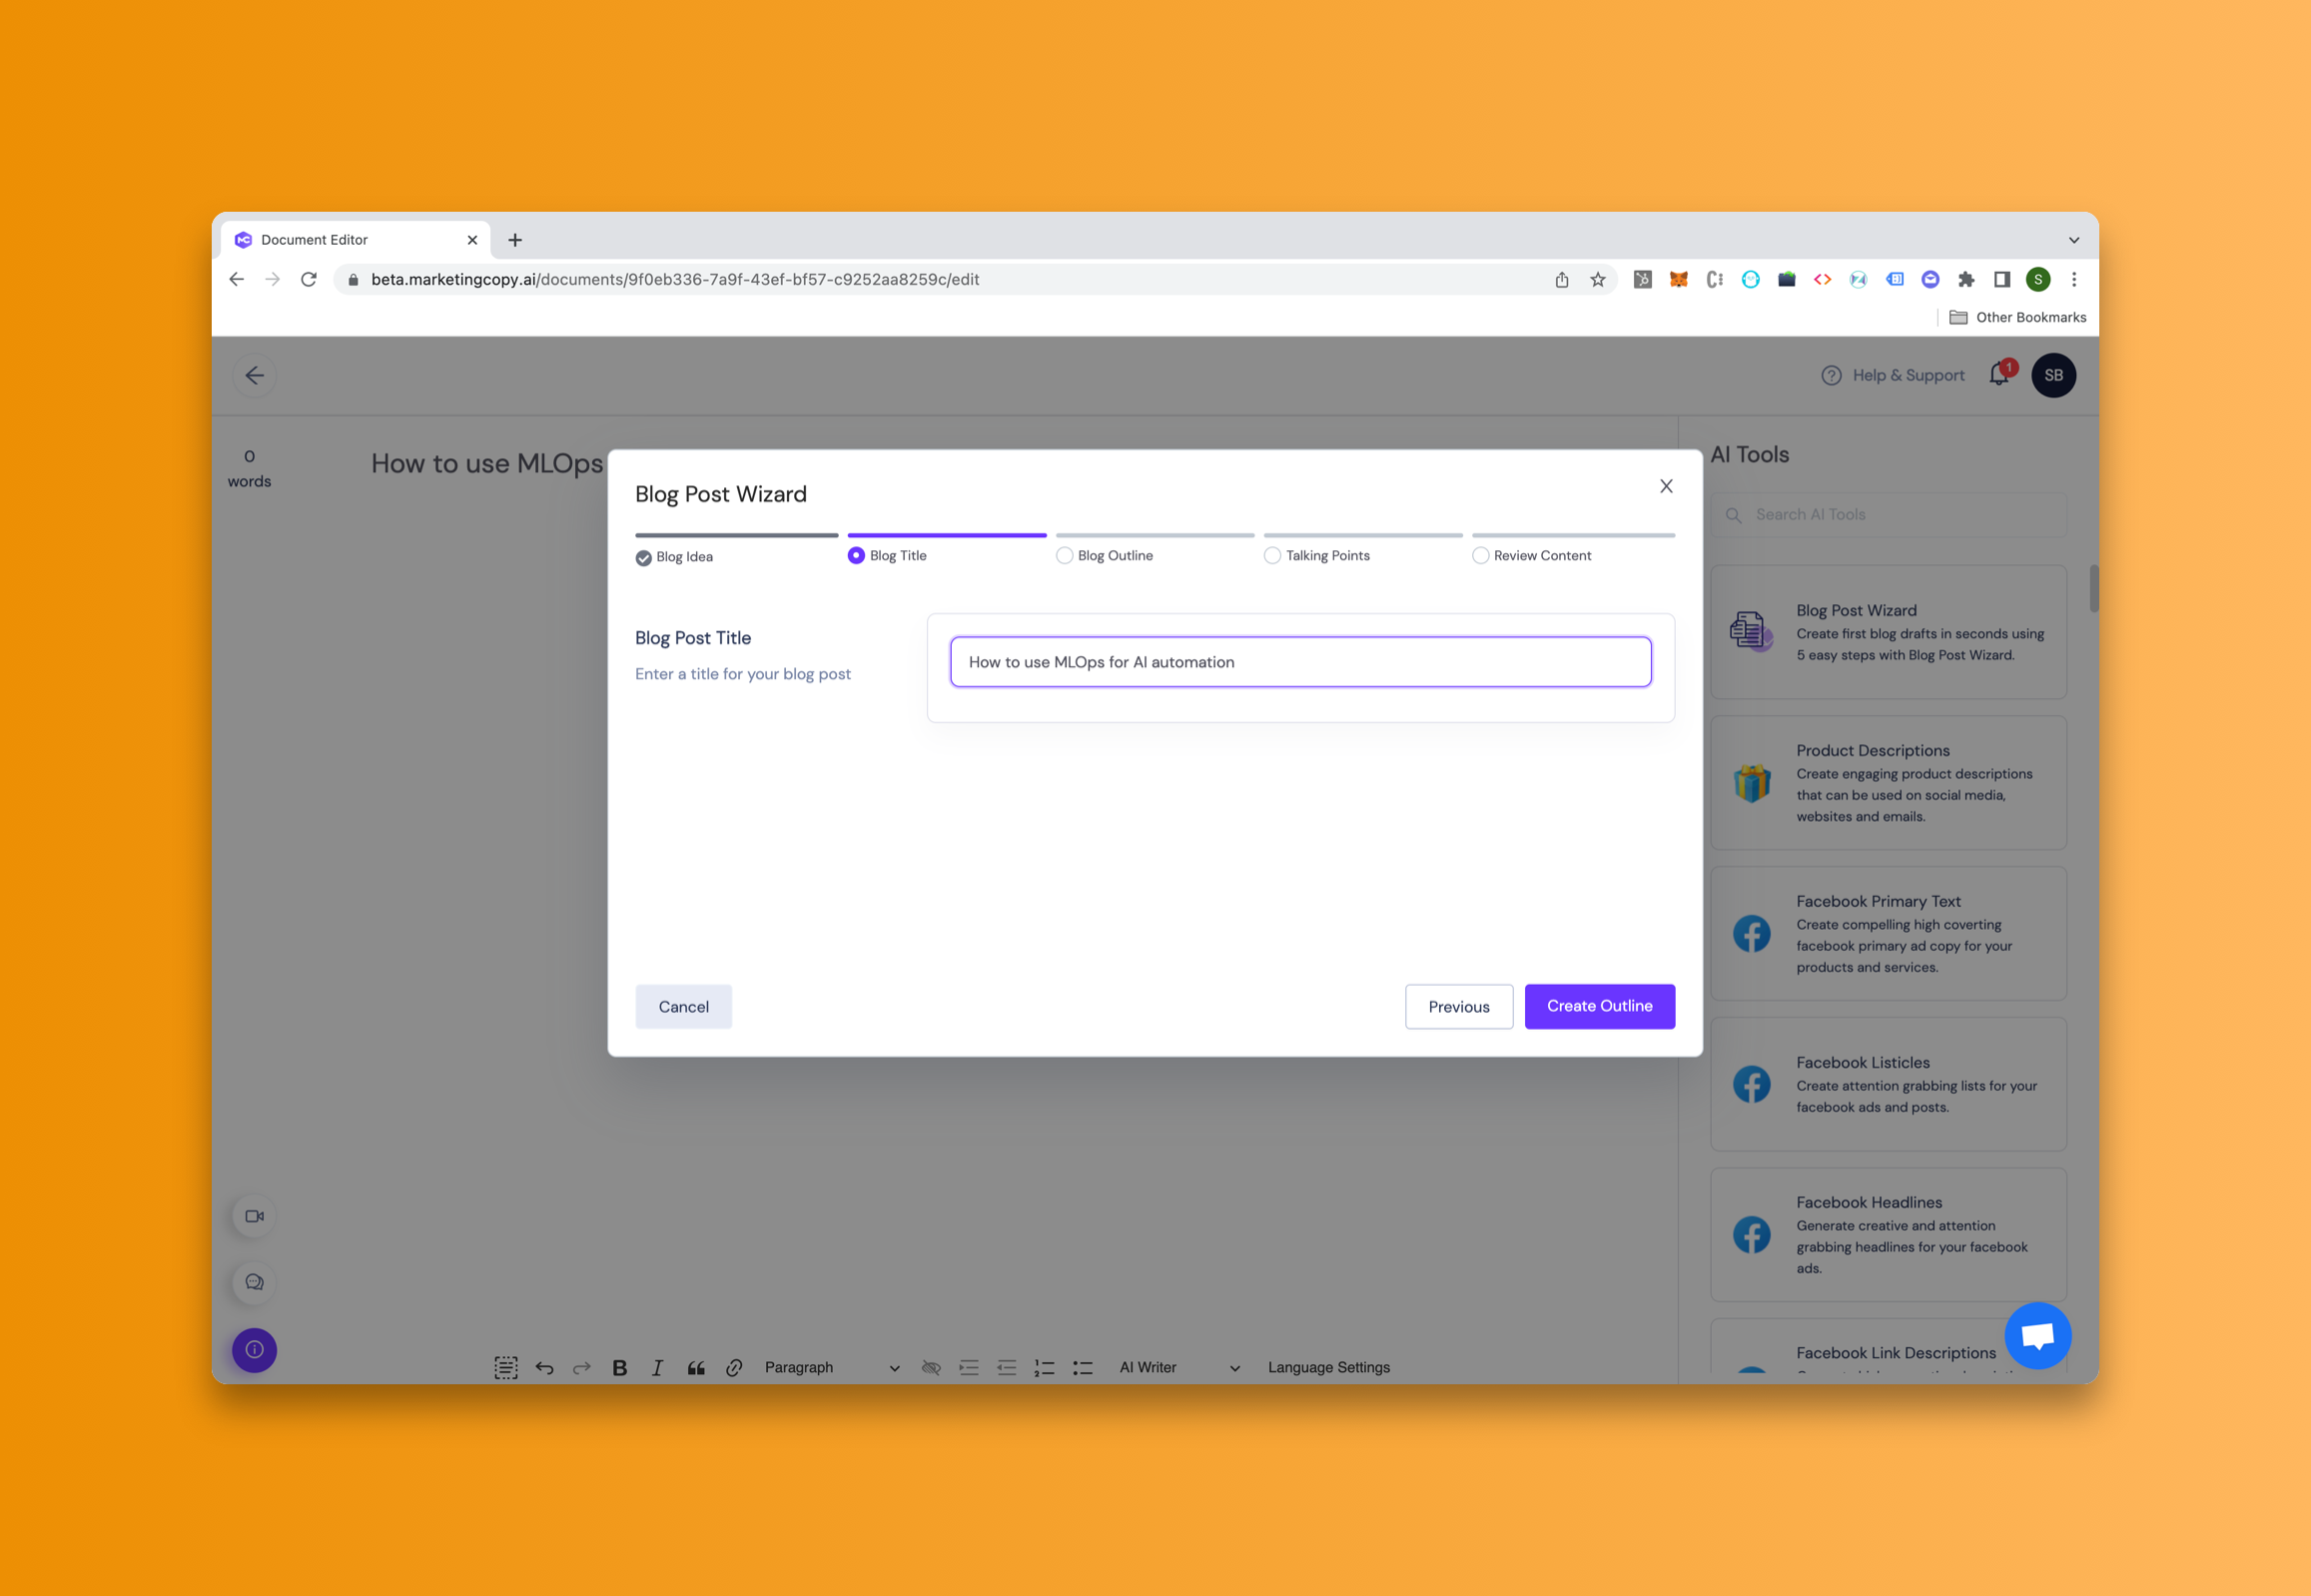
If you already have a blog title in mind then you can select the tone from the first step and just hit skip. This will take you to the next step where you will have to enter a blog title for your blog. Once you have entered the blog title simply click “Generate Outline” to generate an outline for your blog.
3. Blog Post Outline
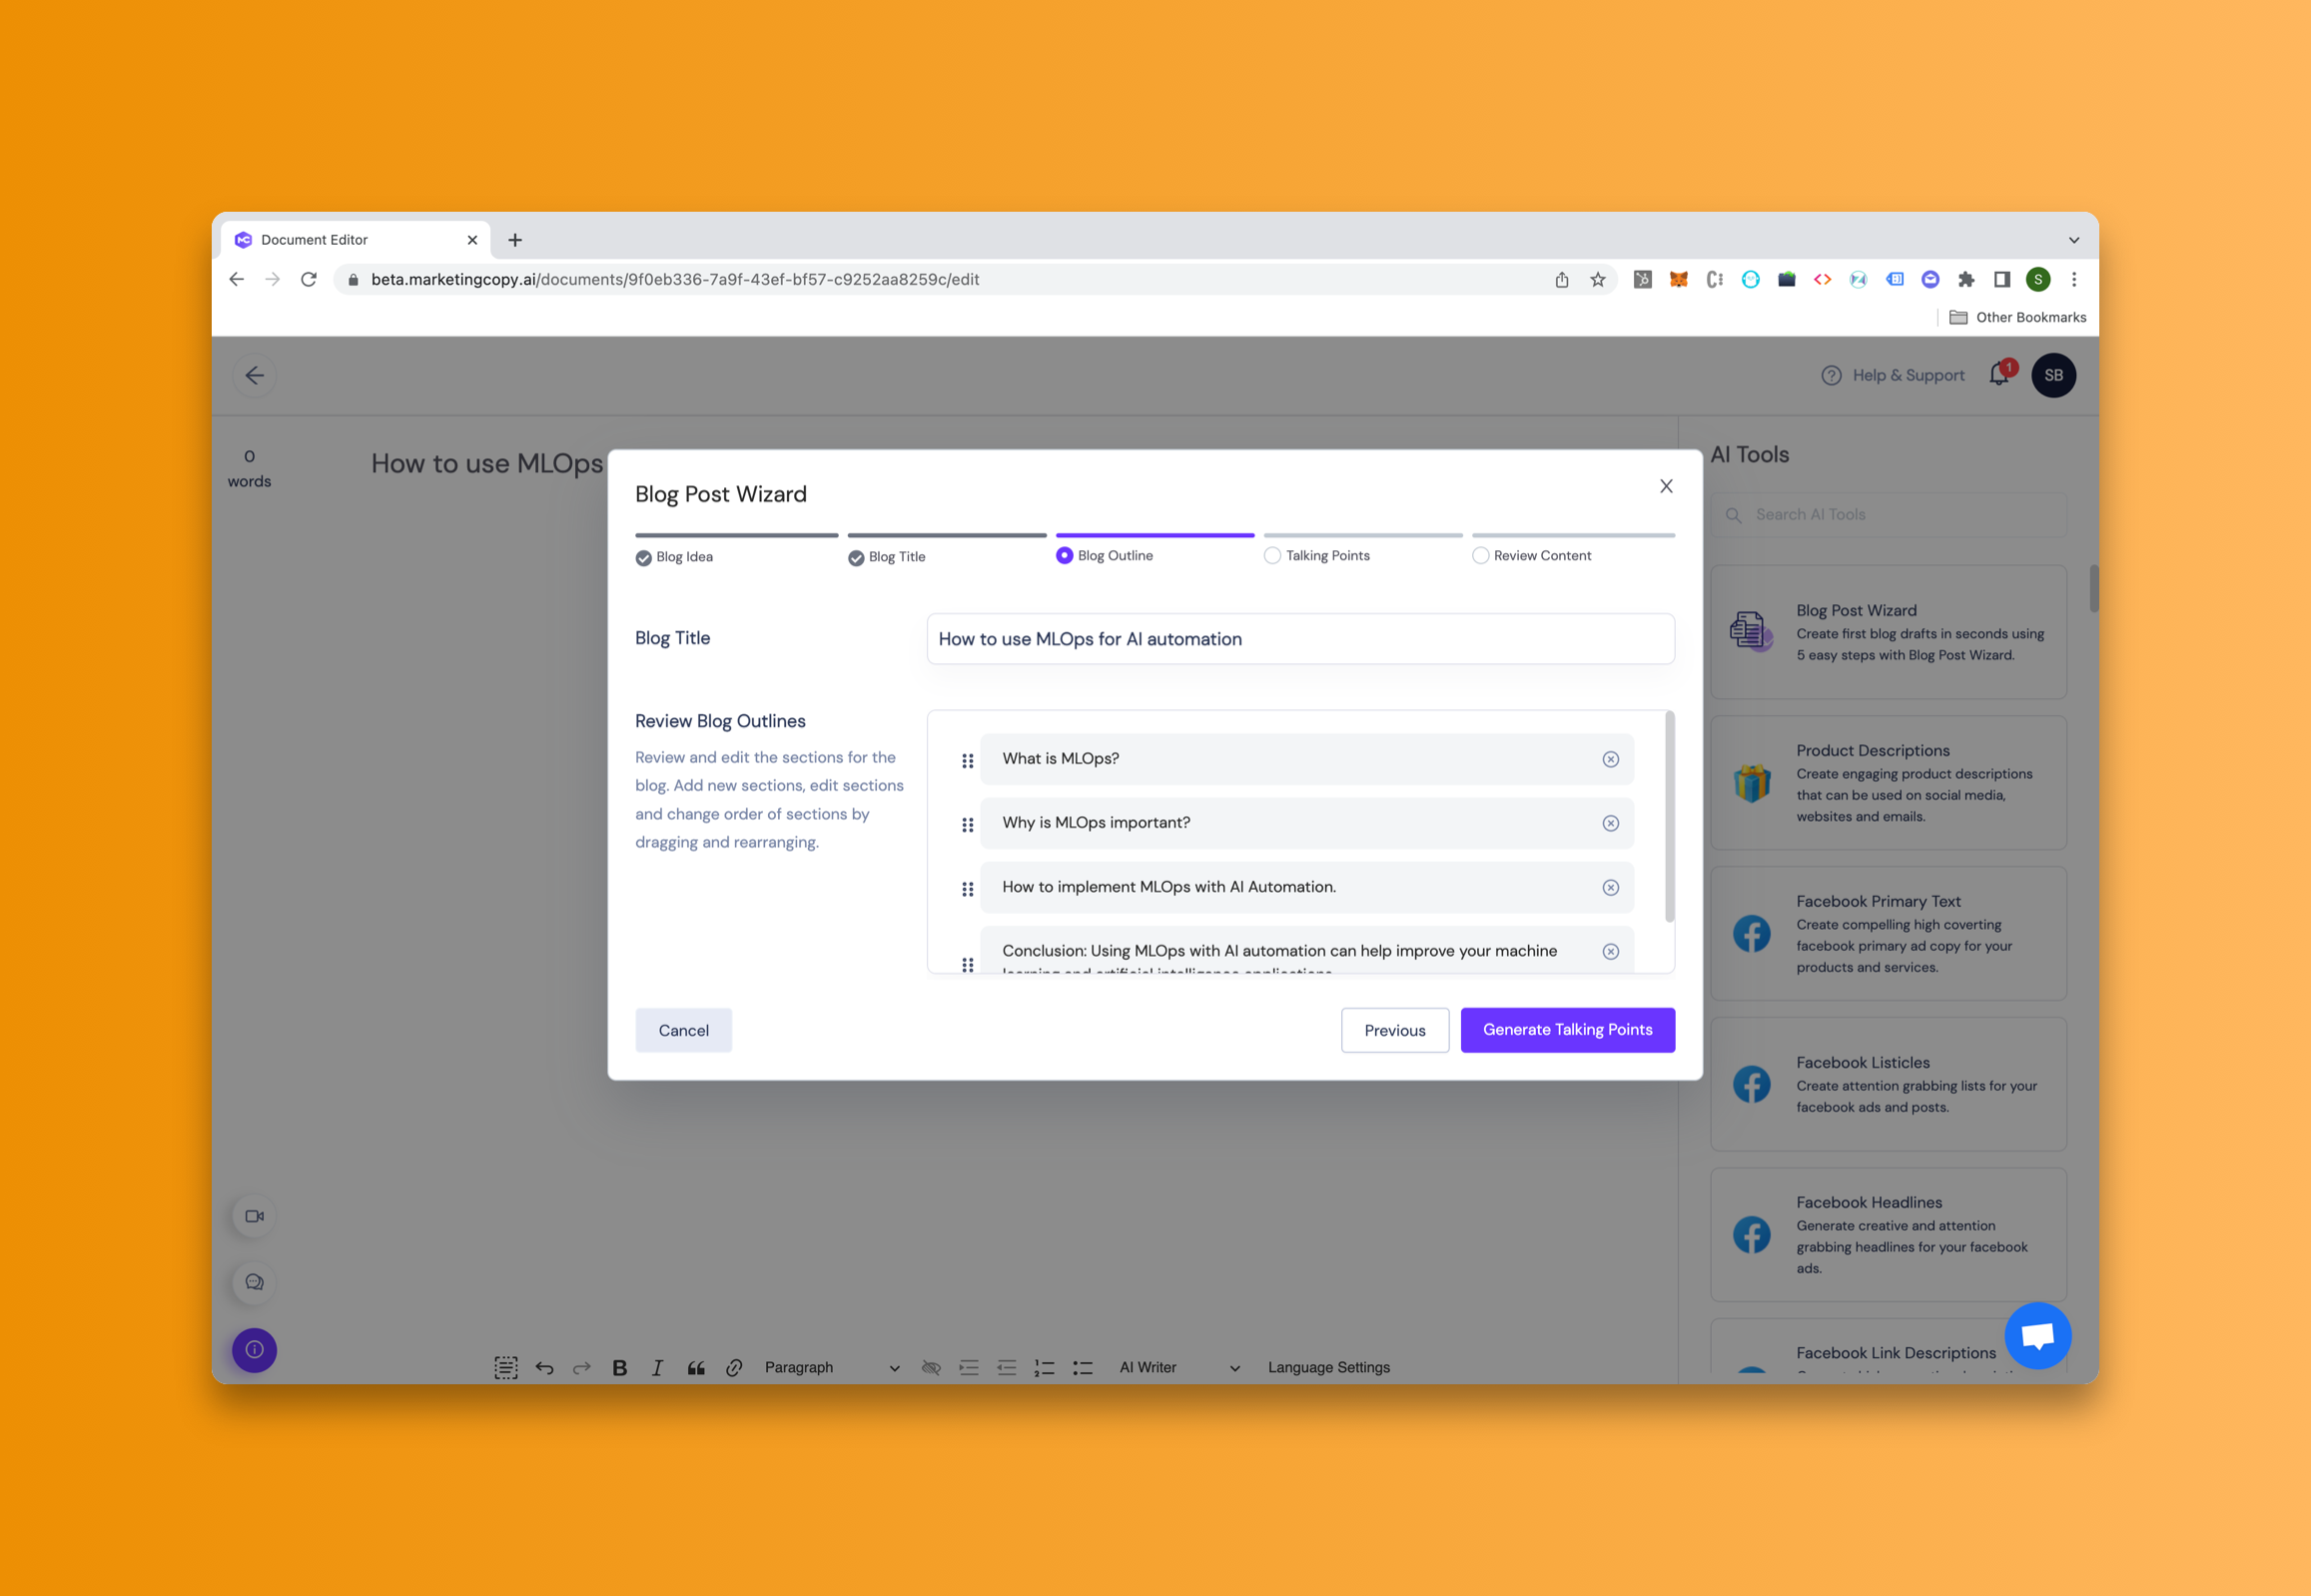
In this step, you will see a blog post outline generated by AI. Here you can edit the outline. You can drag and rearrange the section headings.
If any of the section headings don't fit the blog title or theme then you can edit those by clicking the section, editing it, and then just clicking outside of the box to save the changes. You can also add new section headings using the + icon on any of the section headings. Just click the icon, write the section heading and click outside the input box to save your heading.
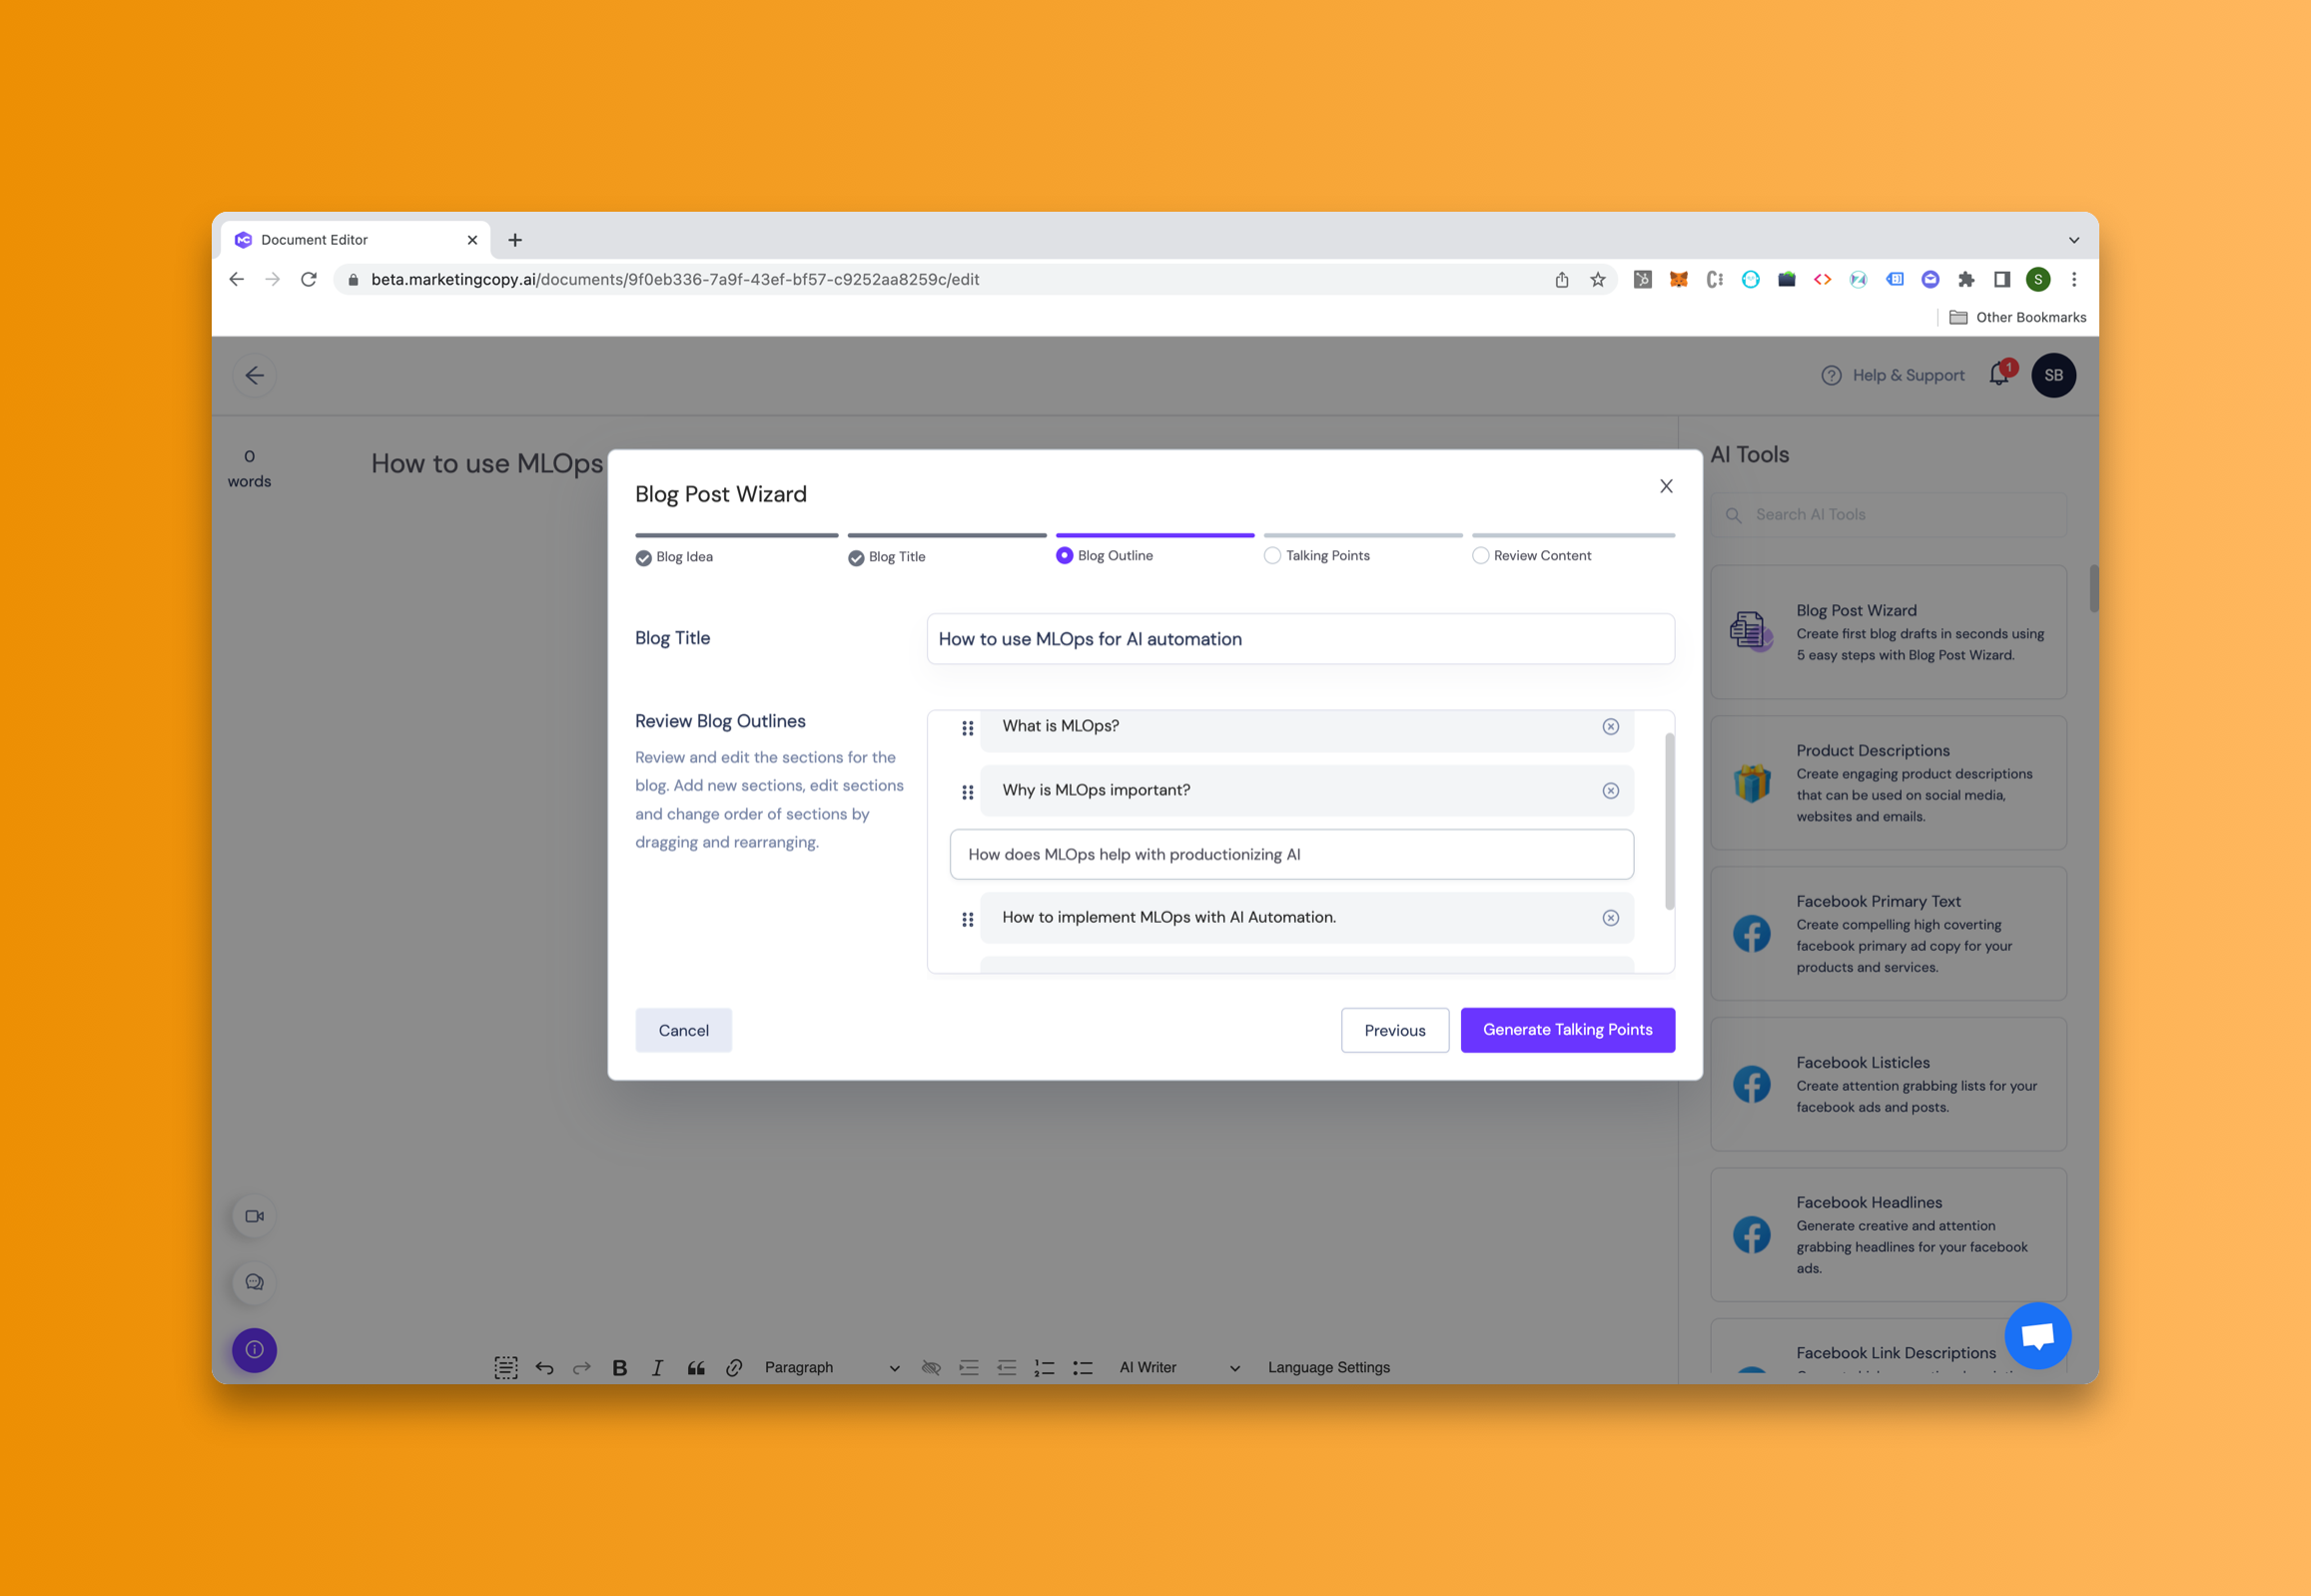
Once the blog sections have been reviewed you can click "Generate Talking Points" to move to the next step of the wizard.
4. Talking Points for Sections
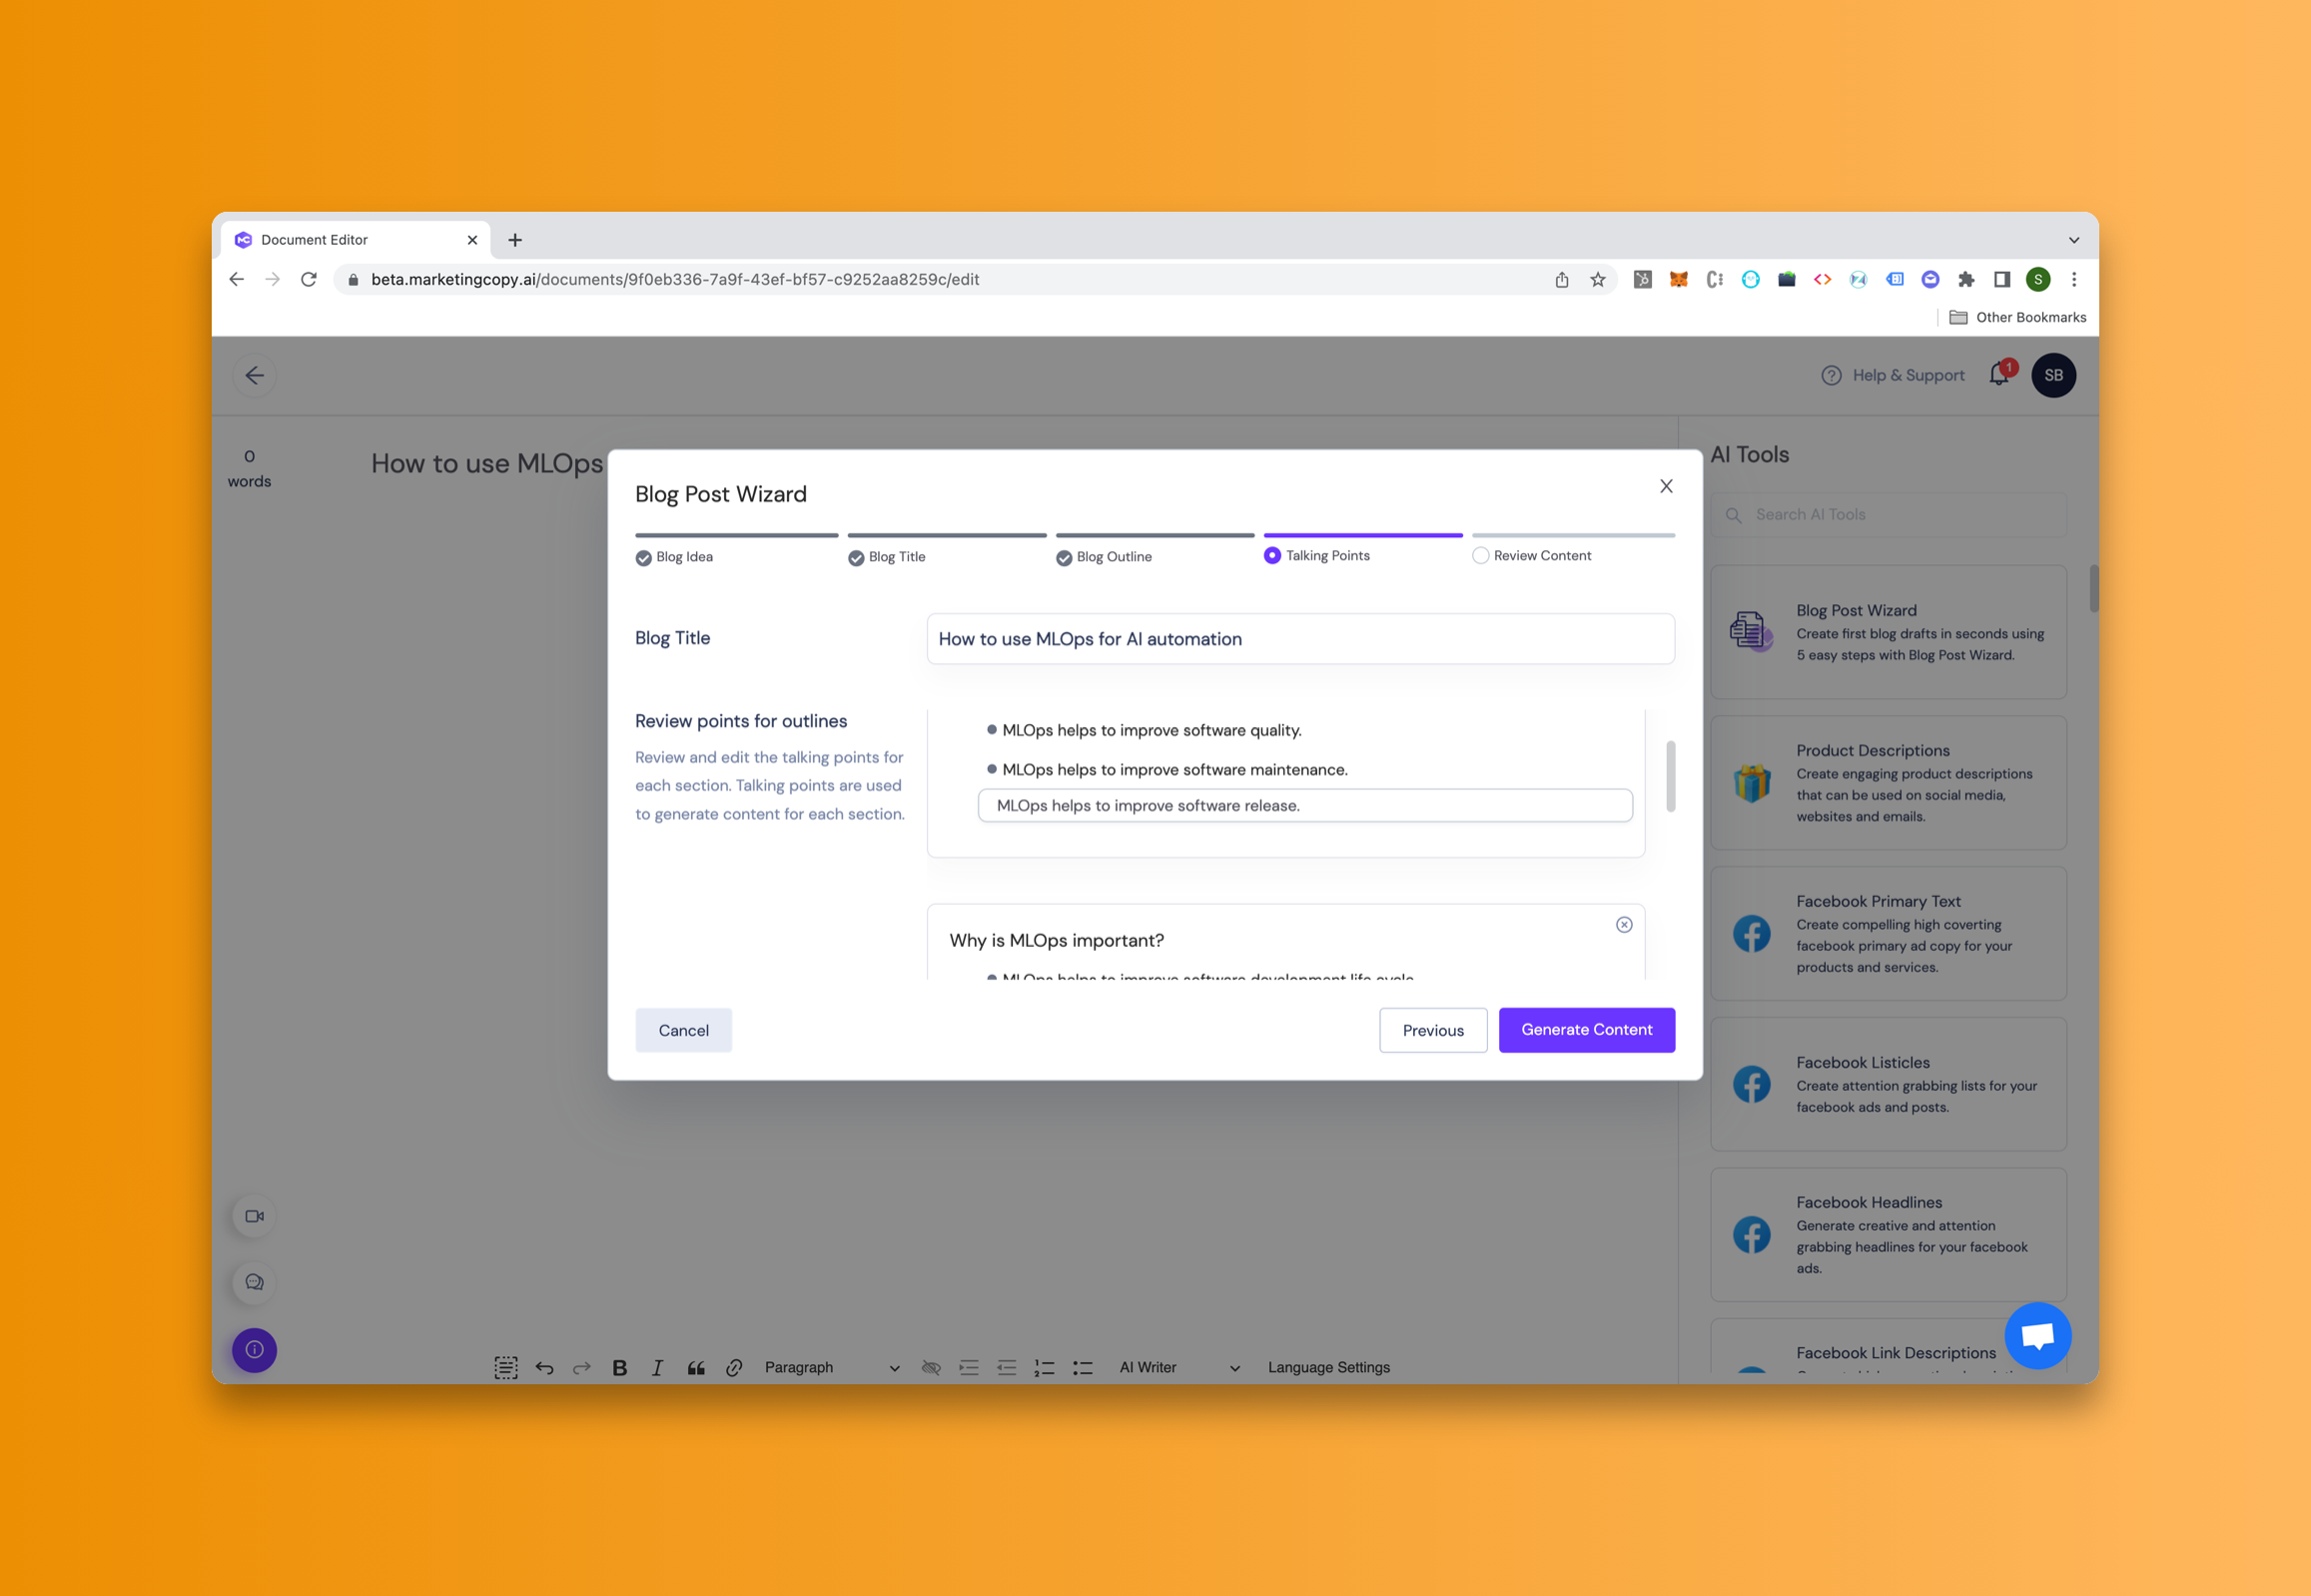
In this step, you will see the talking points generated for each section. The talking points are used by AI to create high-quality content for the different sections. For each section, you can edit the talking points, delete a talking point if it's not relevant and add new ones for the details that you'd like the AI to write about. If there is anything you want the AI to cover in that section then make sure there's a point to cover that. Once you have reviewed the talking points for each section then click "Generate content" to move on to the next step.
5. Generate Content for Sections
This is the last step where you can review the content generated for each section. Here you quickly review the content before you start polishing or refining the content. Once you have reviewed the content just click “Start Editing” to start editing / polishing the content with our Long Form Writing Assistant.
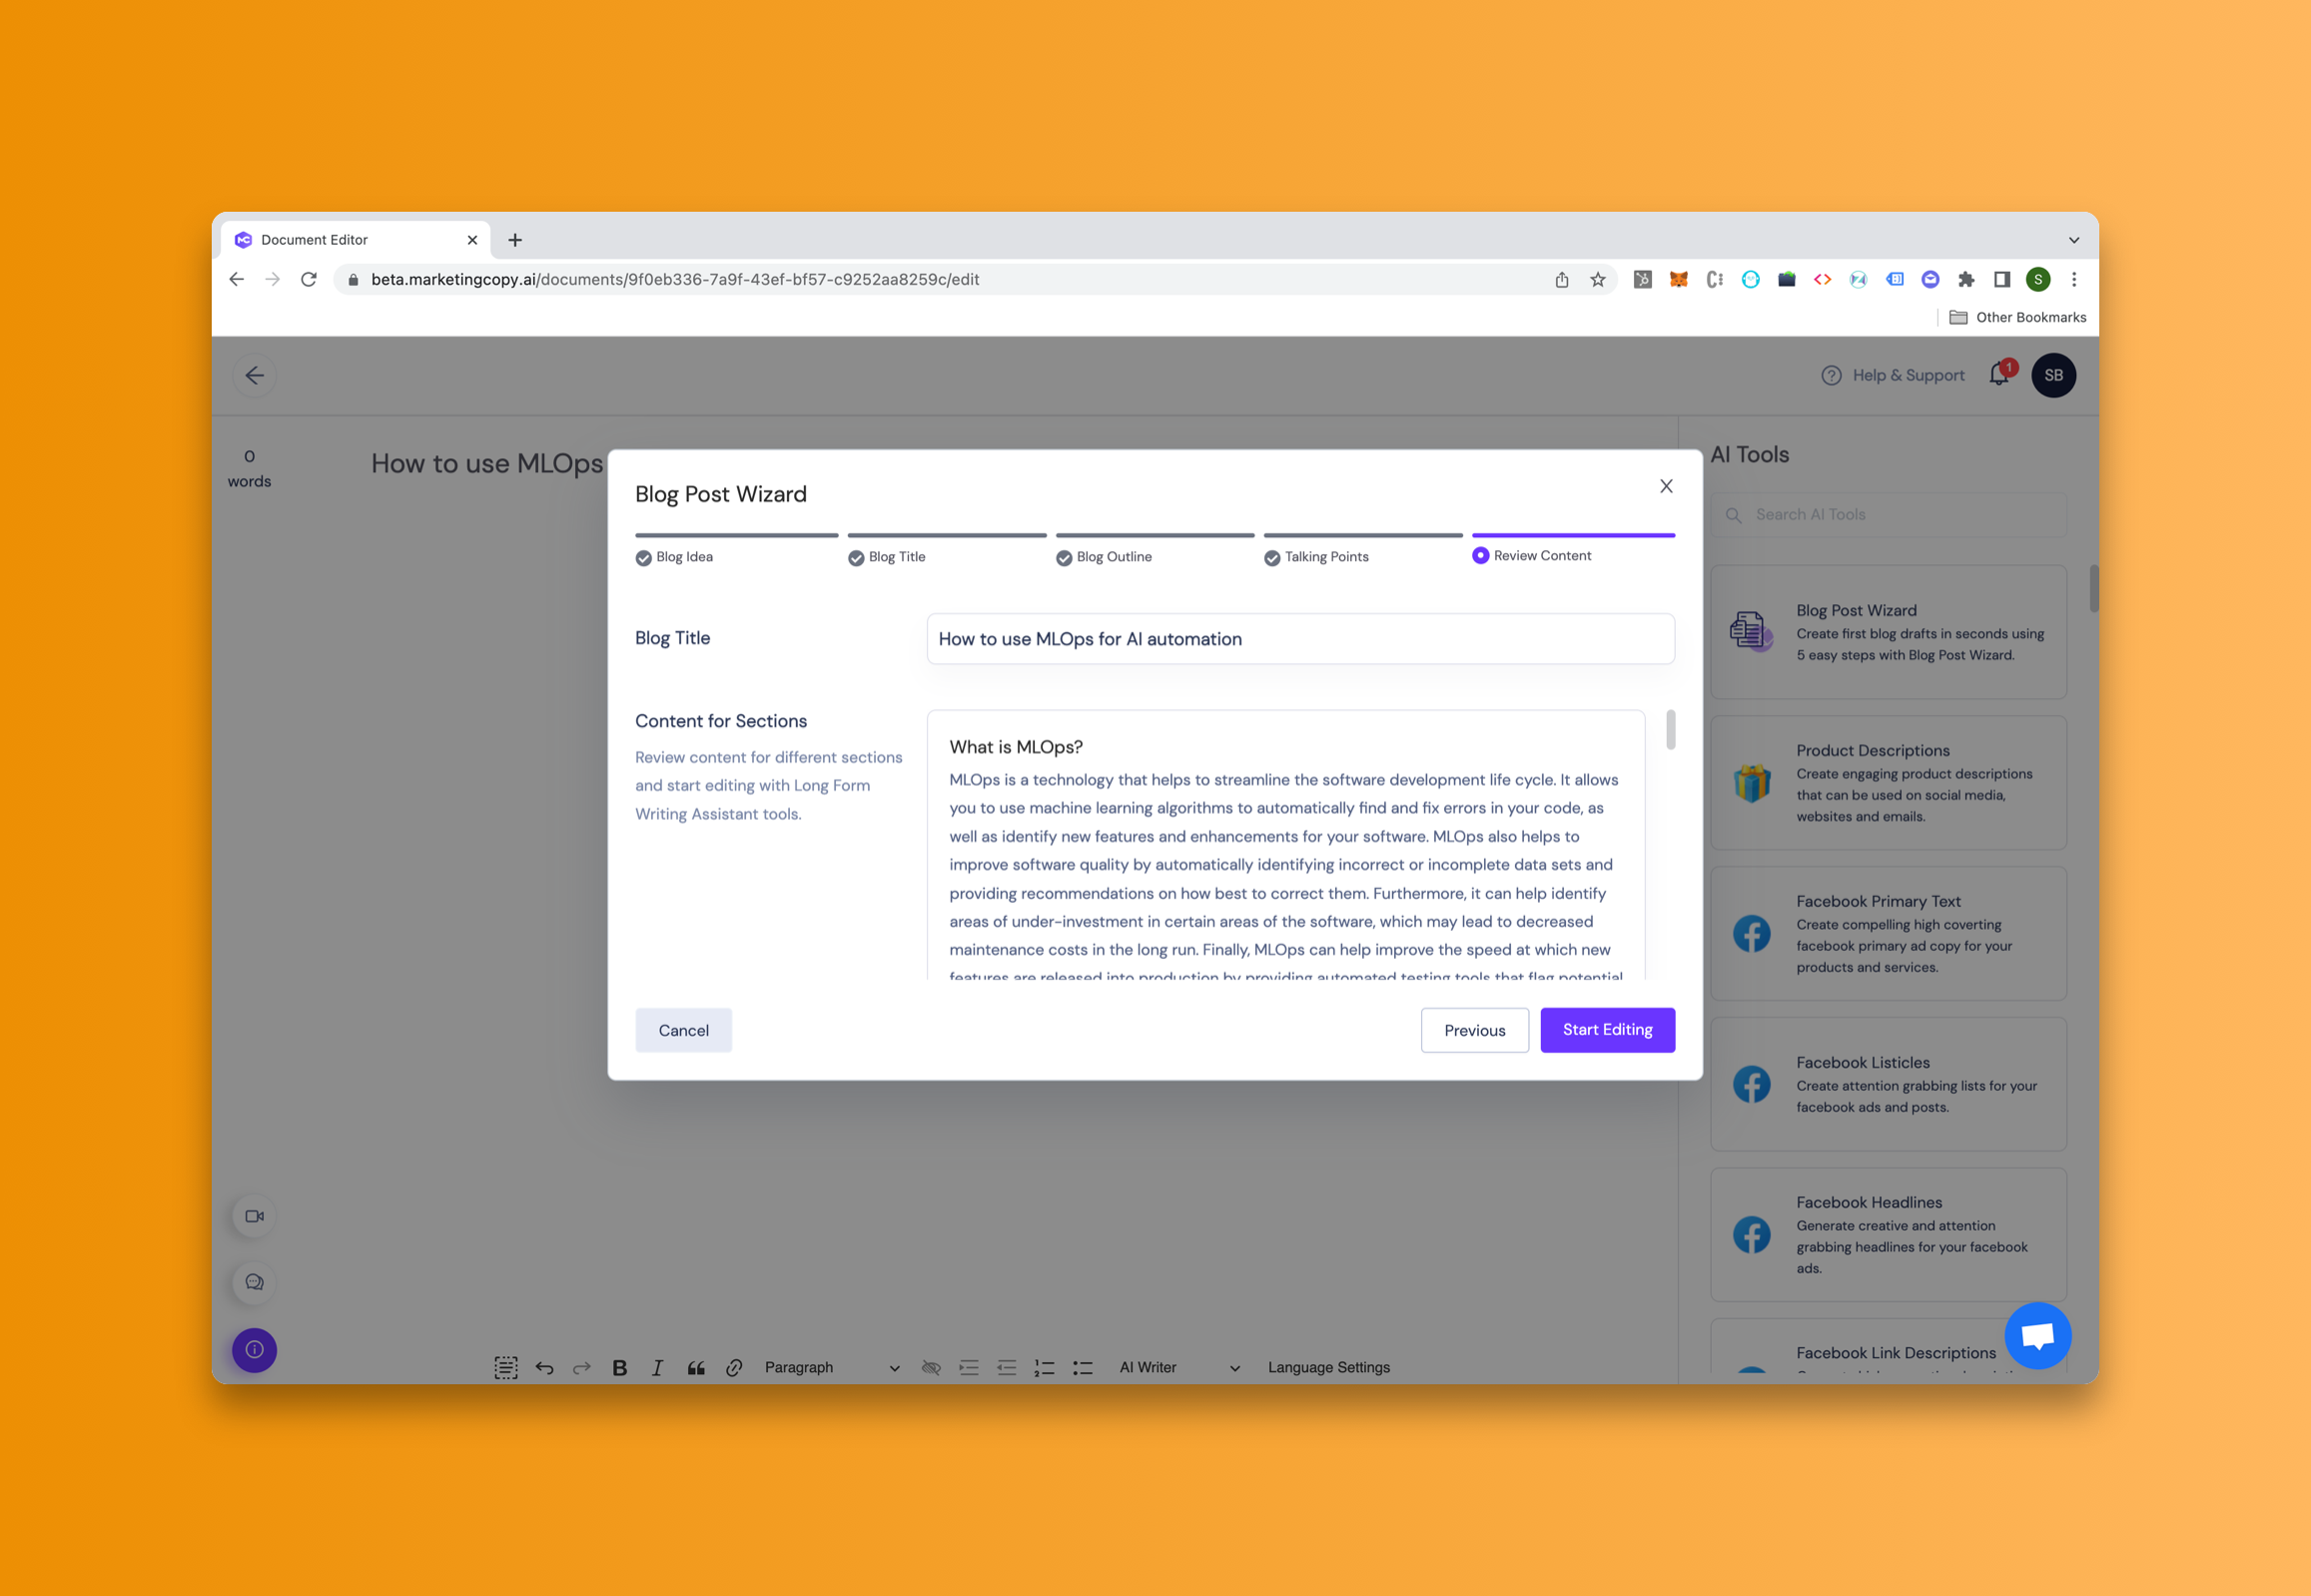
Start Editing with Long Form Writing Assistant
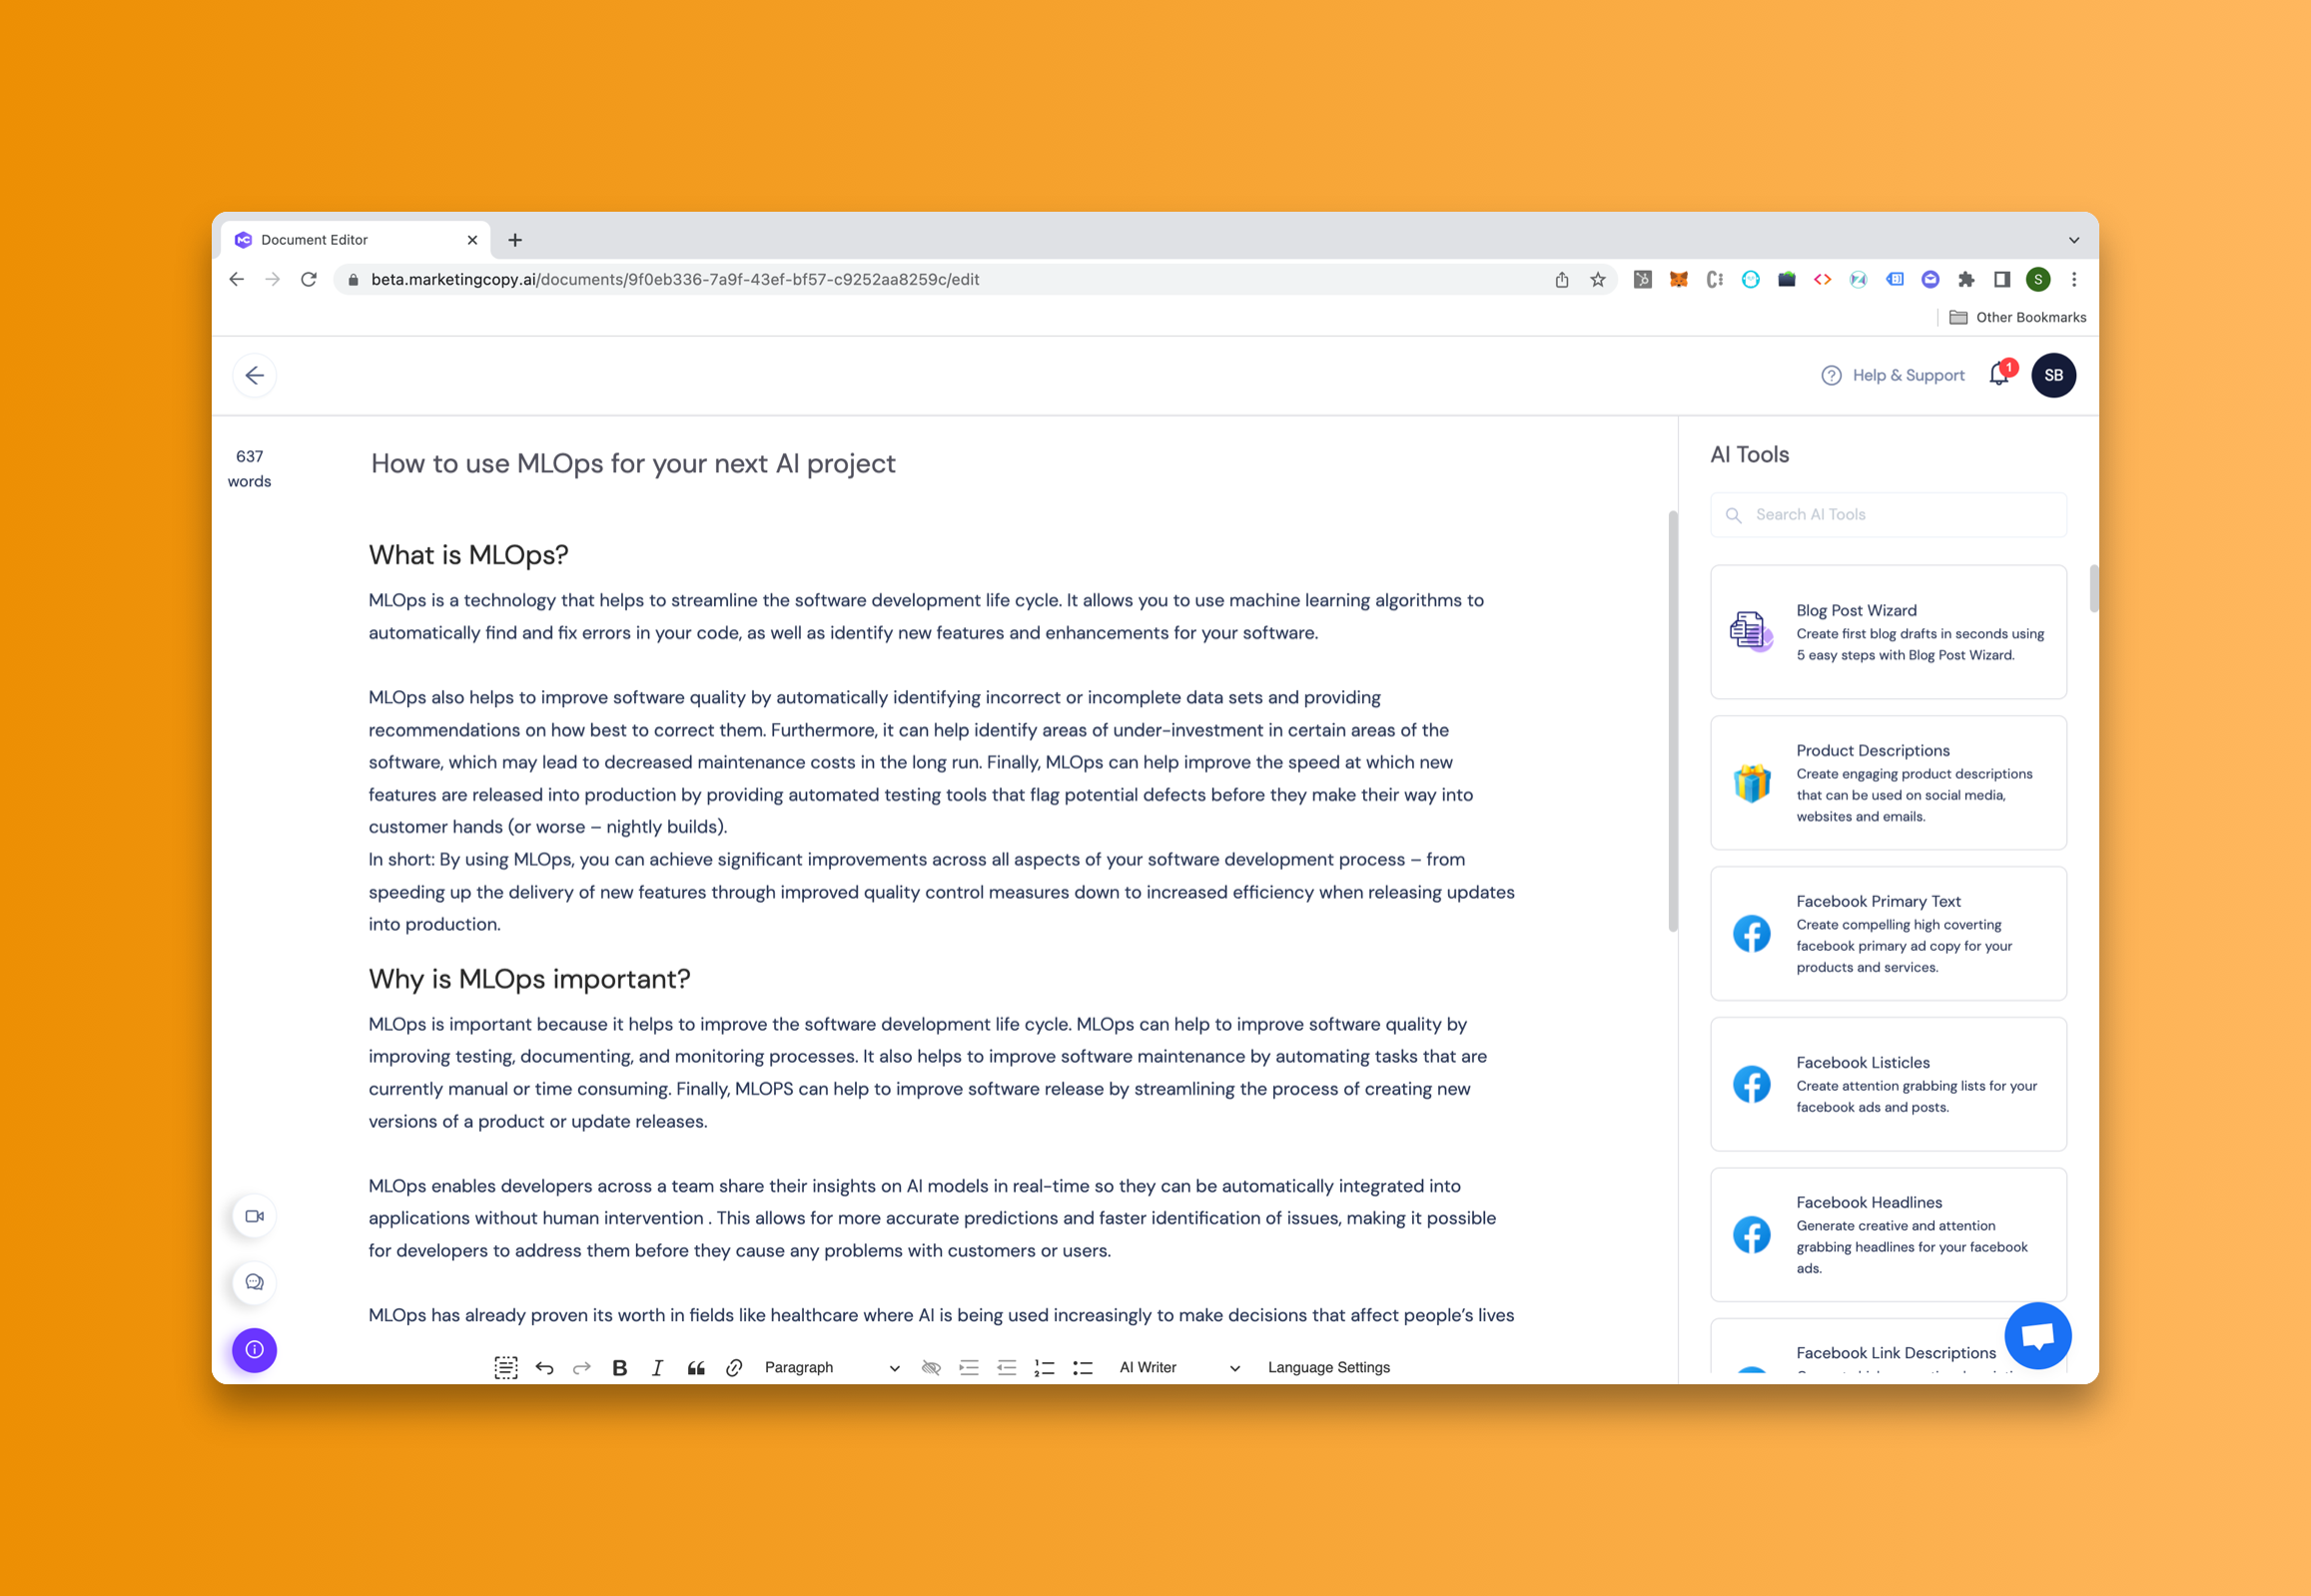
Once you have added the content you can start polishing up the content with our Long Form writing Assistant features.
So there you have it! 5 easy steps to create your first blog drafts in seconds with our powerful Blog Post Wizard. With just a few clicks, you can have a draft of your blog post ready in less than a minute. Simply enter your title and follow 5 steps and let the wizard take care of the rest!


